
How to Temporarily Fix a Leaky Shower Before Calling a Professional
January 3, 2025
A dripping shower is annoying and a wallet-drainer. But don’t worry, there are some quick fixes here and there until the pros come along. Let’s explore how to temporarily fix a leaky shower before calling a professional.
Spotting the Source of the Leak
It is essential first to determine the source of the leak before trying to fix it. Where is it leaking from? Is it coming through the showerhead, dripping from the handle or seeping through the grout? But most things aren’t what they seem, and with a bit of light and up-close inspection, a flashlight will show you more than meets the eye. So this is a time-saver method: If you know what to look for, you can save yourself a lot of hassle later when you fix the problem.
If it is from the showerhead, it may need a simple adjustment or cleaning. Leaks around the handle usually occur from a damaged washer or a (xerographic galley) cartridge. And if the water is moving through grout or tile, wear your waterproof hat because we need to seal stuff up for a bit.
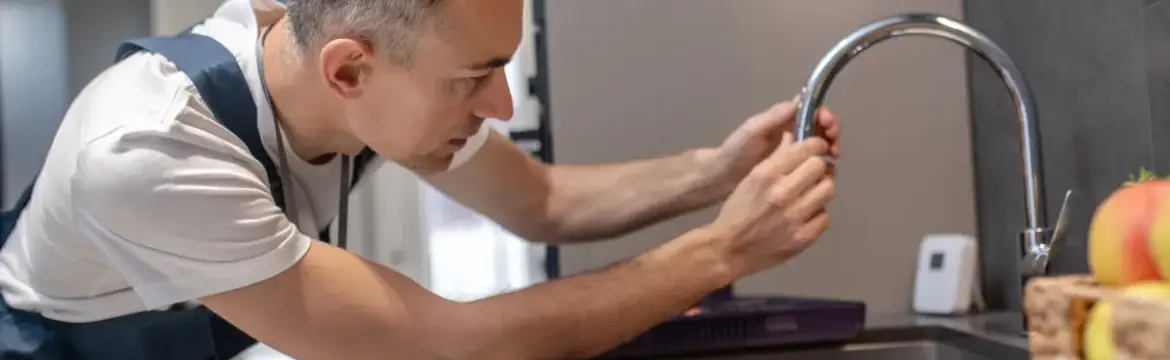
Quick Fix for a Dripping Showerhead
The common cause for a leaky showerhead is either a mineral buildup or a loose fitting. Untwist the showerhead and soak it in vinegar to dissolve difficult deposits. Scrub off any residue with a toothbrush. Tighten it back as you wrap the threads with the plumber’s tape to seal it snugly. If the showerhead is still acting up, it could be due to a rubber washer. Then, unscrew it again, replace the washer, and screw it back on tightly. This straightforward solution typically resolves the issue effortlessly.
Sealing the Handle Area
If you notice water leaking around the shower handle, it is probably due to a worn cartridge. While changing the cartridge is something that a professional should handle, you can minimise the water loss. Shut off the water that provides the shower and take care of it. Duct tape the area leaking, or use a plumber’s putty to fill it. This remedy isn’t a long-term fix, but it does stop the water from running all over your bathroom floor. It’s like putting gum on a leaky boat; it works for now, but you are not going to sea.
Fixing Leaks in Grout or Tiles
When water creeps through grout lines or breaks in tile, get out the tools for a DIY waterproofing project. First, clean your area. Before you move forward, use a hair dryer to dry the surface. Seal with clear silicone caulk everywhere you are experiencing a leak. Apply with a caulk gun so it is evenly applied, and use a wet finger to smooth it over. After this, leave the caulk to dry for a couple of hours without water exposure. It won’t make it permanent, but a band-aid will keep it dry until leaking shower repair Auckland specialists come in.
The Bucket and Towel Trick
If the trusty bucket and towel method is complicated to find or you need more time to get supplies, put a bucket under the part where it is dripping and wrap a towel around it to stop splashing. The procedure helps prevent further water damage and gives you time before considering your next steps.
Turn Off the Water Supply
Sometimes, the simplest way to solve the problem is to shut off the water. Find your shower shutoff valve or main water shutoff valve if no one is nearby. That stops the leak completely and reduces wastage. Although it may not be the most elegant solution, this method temporarily manages the situation until a professional arrives.
Temporary Patching for Cracked Pipes
If the leak is caused by a broken pipe, you are in more complicated waters. Dry the area and use patching or rubber to fill in the crack. Even a piece of rubber from an old cycle tyre can be stored this way with hose clamps, further tightening. This arrangement is not stylish; it protects against water spills before the professionals arrive.
Checking the Shower Valve
The valve controls flow and interaction. In case of leakage, turn off the water supply, remove the valve, and replace any worn components and tape around leaking parts of the pipes (plumber’s tape). If the parts look completely destroyed while you examine them, assemble the valve one more time and screw it back as tightly as you can so that the valve leak status can be minimised. It also works best as a quick fix, but gets the job done in a pinch.
Preventing Future Leaks
Plaster solutions might buy you time, but prevention is the goal to stave off future headaches. Check the wear and tear of your shower regularly. Clean showerheads and handles, and reseal grout and tiles once a year. Harmless repair jobs may prevent bigger complications later on.
Keep a checklist handy to stay on top of these tasks. It’s like giving your shower an annual checkup—simple, effective, and less expensive than an emergency visit.
Know When to Call a Professional
Temporary solutions are lifesavers; however, some leaks require unique skills. If water continues to pool, leaks become terrible, or water bills suddenly skyrocket, the big guns are necessary. A professional can diagnose the problem permanently and repair it, which would be a wiser decision in the long term. For more serious matters, a leaky shower repair Auckland expert shall ensure your bathroom is back to its watertight glory. Those repairs may result in mould, water damage, or increased expenses if left for too long.
The Humorous Side of a Leaky Shower
While leaks can be frustrating, the secret to stress relief is to find the funniest jokes about it. Make each drop a reminder to repair that situation you’ve been avoiding for too long. You might have told yourself, “It’s not a leak; it’s a water feature.” Just don’t let hygge become your bathroom set.
Wrap-Up
Of course, a leaking shower does not need to become a disaster. Armed with this knowledge, you can discover the source, seal with quick fixes, and know when a pro is required. These steps provide peace of mind while waiting for the jabber from a professional, whether it be a bucket-and-towel day or a caulking day. With a toolbox (and a sense of humour) in hand, deal with that pesky leak. Who knows? You may find a new hidden DIY talent you never thought you had! But let the pros do the heavy lifting when all else fails, which it inevitably will. Your bathroom is worth the best, after all.